Blogging is a time consuming process. When I first started I truly had no idea how much there is that goes into blogging. It’s not simply writing posts and clicking publish. No, no, no; it is far more involved than that! I’ve worked hard to perfect my process, and while there is always room for improvement, right now I have streamlined it to my liking. I’m going to share with you every little step and detail, plus at the end I’ve included a checklist for your own blogging needs. Let’s get started!
Ideas
Sometimes ideas flood in at random moments. When that happens I start a draft (mostly just the title and then a few details in the body) to save the idea and then come back to it later. At other times I have absolutely no post concepts and look to lists for the uninspired. Check out this one, this one, that one , this one too, and finally this one.
Writing
This is my favorite part! Actually writing out your posts can take hours on end or minutes, depending on your mindset, environment, or any number of factors. I work best by just diving into a post, but I know some people prefer to do an outline so they hit every point they want to. I usually write a post (all or part depending on the time I have) and then leave it for a few hours or a day. Once I come back to it I proofread and improve it any way I can.
Images
Now the fun, visual side comes into play. Words are great, but on the internet images can make or break you. My photography skills are really not up to par so I use stock images and add text. Canva is the photo editor I use. It is especially good to be consistent with the branding of your images (check out a post from Elle & Co. all about that) and I find it easy to do so by using the same filter and text layout in Canva.
Not only do I create an image for my post (and keep the width and height consistent) but I also create an image for Twitter. On Canva there is a sizing option for Twitter which makes it very convenient. I also back up all of my images by saving them on my computer and in google drive. Canva also saves the images you create so you can download or modify them at any time. I just like to have backups of the backup 🙂
To make it easier for Pinterest purposes, I add Title and Alt text. Usually I put the title of the post and a link to my blog.
Labels and Scheduling
I use labels to categorize my posts which helps keep everything organized and makes it easy to navigate on the blog. At one time, I had tons of labels and would give a post 4 or 5. Now however, I stick to assigning a post 1 or 2 at the most. This helps keep the blog focused.
I then schedule the post to go live. All of my posts go up at 5am and I usually schedule two weeks ahead.
Put it on the Calendar
On my iCalendar I have a different color for all things blogging. I put my posts up so I can visualize what topics are on what dates and to make sure there’s variety. I often rearrange my posts when I decide to post more timely information, so it’s essential to have it all mapped out on a calendar.
Schedule Tweets
I use TweetDeck to schedule my tweets and I absolutely love it. Now is when I use the image I made before specifically for Twitter and I include my permalink which is created when I scheduled the post. I schedule tweets anytime in the 10 or 11 o’clock hour on the day the post goes live, and on days when I don’t have a post I make sure to share something I’ve found interesting to maintain engagement.
Sharing
On the day my post goes live, I share it on Pinterest (which is where I get the vast majority of my traffic) and respond to comments as they come in.
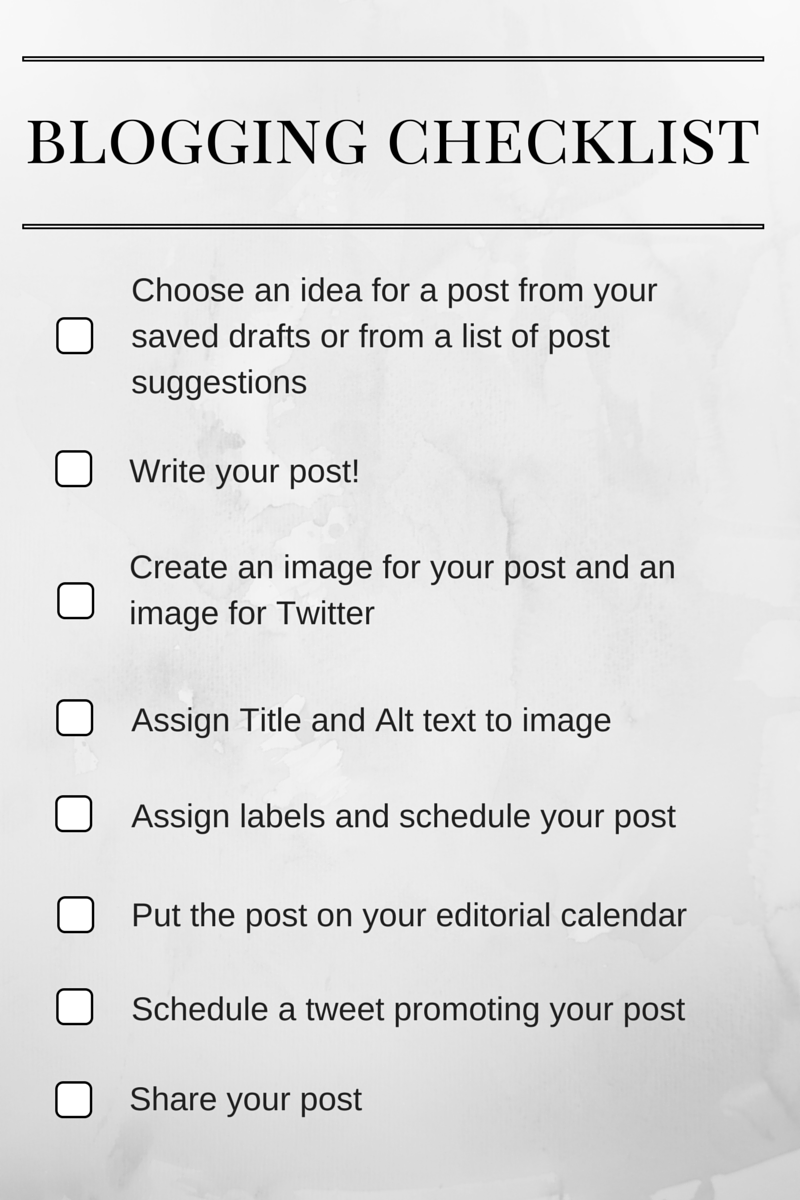
Well, that about sums it up! Feel free to use this checklist for your own blogging process. I want to become better at using social media to drive traffic and to create more of a community, so that will enter my blogging process as I figure out how to incorporate it. Any advice on that front would be much appreciated.
What is your blogging process? Are there any steps you think I should add or eliminate?


Leave a Reply